Creating a fleet of accurate caboose models can be both frustrating and expensive, no matter what road you're modeling. Here's an attempt to alleviate that.
The Wabash maintained a significant fleet of wooden cabooses in Ontario for it's operations. As far as I can make out to date there are at least 3 different basic styles as reflected in the number series and from photographs.
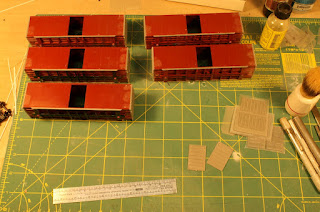
Overland imported a very nice brass model of a 2600 series, but since I'm requiring upwards of 10 cabooses a more economic solution is warranted. I stumbled upon a Walthers offering of a 3 window, offset cupola factory painted in Wabash colors and quickly realized that this might be a solution.
While not completely accurate, I feel that a very acceptable stand in model could result without too much effort.
A study of prototype photos indicates that some of the 2600 cabooses had a fourth window on the right side behind the cupola and some on the left and some had the fourth window on both sides. Adding that window and few other minor detail changes would give me what I'm after.
I managed to locate an undecorated kit for this project, but a decorated car could be stripped and modified just as easily. Work started with laying out the 4th window making it the same size as the existing ones. I drilled holes in the corners of the openings for relief, taking care to remain within the marks. After cutting out the majority of the material, I filed to final size. The sash was then created with 2x3 styrene, and the casing was created using 1x3 and a 1x2 sill. These sizes closely match the cast windows.
The next task was to relocate the stack. Photos showed it further away from the cupola then on the model. The cast on detail was shaved off, the board gaps lightly scribed in and holes drilled for the stacks new location.
With that done the cupola was glued in place and cupola braces added using 1x2 styrene. Some of the 2600 cabooses had braces that were a rod with a turnbuckle rather than a strap. Referring to prototype photos helps determine which car gets which.
At this point I drilled all the holes required for mounting the grabirons that come in the kit. In retrospect the holes in the roof should not be drilled, as the ladder in the kit is on the wrong side. I had to fill those with putty along with the mounting holes for the ladder on the end fascia. I mounted all the grabs on the end before dealing with the end rails and ladder.
But before tackling the end, I decided to fully detail the underbody. The upper level of my layout is at eye level and caboose underbody details are very obviously busy. I used a Tichy AB brake set and levers from American Model Builders. These are laser cut in a resin impregnated paper and are very handy for superdetailing underbodies. The actual brake rigging was copied from a True Line Trains model of a CN caboose which I know to be correct. This work can appear daunting, but is actually easy to do and quite satisfying.
The end rails were tackled last. The ladder was cut away from the end beam and turned over and repositioned to the right side of the end. The railings were then bent up using photos as a guide. Take care not to glue the upper portion of the ladder to the fascia. It will be one of the last tasks in the project.
With that it's time for the paint booth. The model was painted with a Scalecoat boxcar red. I prefer using Scalecoat paints as they dry with a gloss finish making them ready for decals. After allowing the paint to cure for a couple of days I applied Wabash Caboose decals from Mark Vaughn and followed up with a flat finish to seal the decals. The railings were painted UP Armor Yellow again following a color photo for reference.
Cabooses don't seem to get a lot of respect, so a good dose of weathering was in order before final assembly. Oversprays of grime, mud and black gave me the results I was after. With that clear styrene was glued into the window openings and the roof snapped in place. The ladders were glued to the upper fascia and we're ready for service.
It should also be noted that I replaced the stock wheelsets with semi-scale wheelsets from Reebox. They look so much better, have far better rolling characteristics and the metal wheels stay cleaner than plastic.
I'm very pleased with this model. I feel that I've created a very acceptable standin model that will serve for years to come. 3 down, 5 to go.